
Flower Garden Soap Bars DIY
Spring Flower Garden Soap Bars DIY
This flower garden soap bars DIY project is a fun way to learn how to make bath soap!
If there’s one thing I look forward to more than fall in the country, it’s spring in my gardens. As I write this, yellow daffodils and tulips are brimming with cheer, and soft green lamb’s ear is sprouting. I can hear robins and chickadees chirping for spring out my open window.
Whether it’s pressed flower vases, a spring floating candle centerpiece, or a handmade soap, I love finding ways to bring spring indoors.
This melt and pour soap recipe is just the thing to bring the colors and scents of a spring garden into your home. Blooming with a fresh floral scent, a wash of color, and topped with dried flowers, these farmhouse soap bars are it!
Why not ask a friend or family member to join you for a fun, creative afternoon on the farm, creating handmade soaps?
I’m sharing everything you need, including detailed instructions for decorating soap with flowers without turning brown. I’ve also got several ideas for displaying homemade soap in your farmhouse!
For your convenience, this post contains some affiliate links; read the full disclosure policy.

How Do You Keep Flowers From Turning Brown In Soap?
I love flower crafting, but decorating soap with flowers can be tricky. That’s why I’m sharing a few soap-making tips I’ve learned to keep flowers from turning brown in soap.
Avoid Fresh Flowers
Moisture in fresh flowers will cause them to turn brown quickly. Instead, use dried or pressed flowers, such as dried jasmine or chamomile buds.
Choose Small Blooms and Petals
When you use soaps decorated with flowers, they have the potential to clog drains. To avoid this issue, select small blooms and petals. Rosebuds and lavender petals are great options!
Use A Melt and Pour Soap Base
When most flowers come in contact with lye and water during cold process soap-making, they turn brown. In contrast, melt and pour soap making has already gone through saponification, so any added flowers won’t be exposed to active lye.
When In Doubt, Sprinkle On Top
The best way to avoid flowers turning brown in soap is to sprinkle them on top instead of adding flowers to the soap batter. I’ll teach you how to do this in the instructions below so the flowers stick to the soap and retain their color!
Store Uncovered
When adding flowers to soap, store the soap bars uncovered and do not tightly wrap them. This is a soap maker tip I recently learned to avoid flower sweating in soap.
Related To: Making Wax Melts With Flowers
find this helpful?
Share It On Pinterest
While there, follow Our Farmhouse Chic Living for more inspired ideas.
Tag #farmhousechicliving on Instagram to share your farmhouse tips and ideas!
How Do You Color Melt and Pour Soap?
How do you add a pop of spring color to your homemade soaps? These tips will help you achieve vibrant and beautiful colored soap bars.
3 Tips for Coloring Melt and Pour Soap
#1 Use A Small Amount: Start with a small amount of colorant and gradually increase the intensity until you achieve your desired shade. Adding too much can result in a soap that is overly pigmented and may stain the skin.
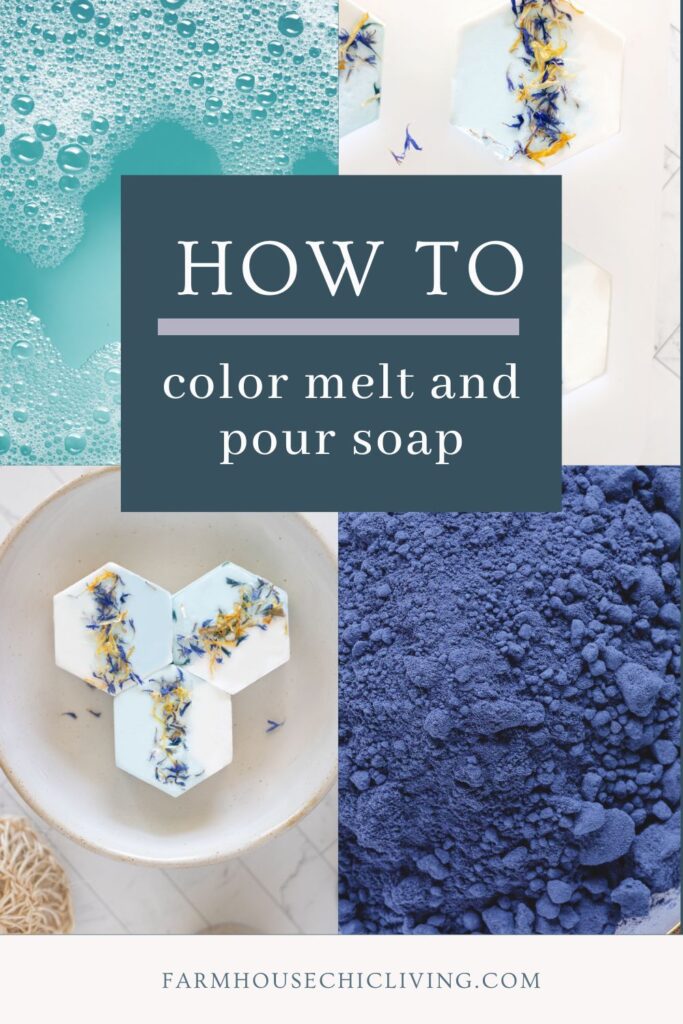
#2 Use Skin-Safe Colorants: Always opt for skin-safe colorants. A variety of natural choices, such as pigments and botanical powders, can create beautiful color effects in soap. I chose a unique blue butterfly pea powder to create stunning blue hues!
#3 Test Colors: Always conduct a small test batch of soap to assess the color stability and performance of your chosen colorants before making a larger batch. This will help you avoid any unexpected color changes or fading over time.
Following these simple tips, you can confidently color, melt and pour soap. So, you’ll add the perfect touch of springtime beauty to your farmhouse soap bars.

How Do You Display Decorative Soaps?
I love how melt and pour soap bases turn soap making into a fun and creative craft anyone can enjoy. As quick as a cake mix, you’ll have soap poured in minutes instead of hours!
With such ease, you’ll have soap bars lining the countertop and a need for ideas to display soap.
Here are a few ways I decorate with soap:
By incorporating extra soap bars into your farmhouse decor, you’ll add both style and functionality.
Flower Garden Soap Bars DIY For Spring Time
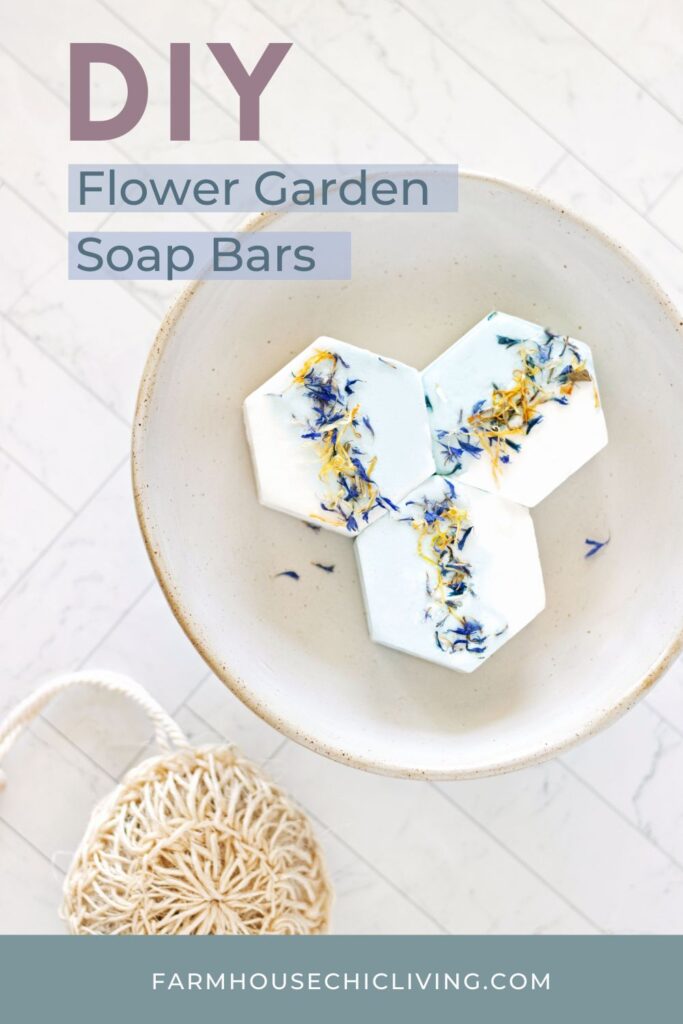
There’s nothing better than handcrafting small batches of soap on the farm. Follow this tutorial to make your own DIY soap for spring. Each bar is completely unique, blended with butterfly pea flower powder and sprinkled with cheerful yellow and blue flower petals.
here’s what you’ll need:
Flower Garden DIY Soap Instructions
1. Prep Your Workspace:
Prepare a clean workspace in your farmhouse kitchen to make soap and gather your supplies there.
I put my growing collection of cutting boards and trays to use by supporting the hexagon soap mold.
2. Chop, Measure, & Divide Soap:
Chop 9 ounces of a shea butter melt and pour soap base with a soap knife into 1-inch chunks on a cutting board.
Then, divide the chopped soap by placing a large glass measuring cup on a digital scale. Then tap to tare the measuring cup’s weight and add soap chunks until you reach 4 ounces.
3. Melt & Scent:
Put the glass measuring cup filled with the chopped soap into the microwave. Melt the soap for one 45-second interval, stirring with a heat-resistant silicone spatula or wooden spoon. Then, melt again for one 30-second interval or until liquid.
Remove from the microwave and add ½ ounce of soap fragrance to the melted soap. Stir and set aside.
4. Repeat & Add Color:
Repeat step three for the remaining 5 ounces of chopped soap base. Then add ¼ teaspoon blue butterfly pea powder to this liquid base. Stir well to blend the color thoroughly.
5. Pour The Soap:
With the help of a friend or family member, use the measuring cup spouts to pour each container of melted soap into opposing sides of each cavity in the soap mold. This is what created the unique two-tone soap bar color!
6. Decorate With Flowers
Now, allow each soap bar to begin to cure. Once a thin skin has formed across the soap bars, spritz it with rubbing alcohol to remove bubbles.
Then sprinkle 1 teaspoon of calendula flower petals and 1 teaspoon of blue cornflower petals down the center of each soap bar, essentially seaming the soap halves together.
Notes:
- Once complete, these DIY soaps won’t take weeks to cure; a few hours is all you need before lathering up!
- This farmhouse soap recipe makes 3 soap bars.
MORE FARMHOUSE IDEAS:
- Easy Pressed Flower Candle Craft
- How To Press Flowers In A Book
- How to Clean Mattress Stains and Deodorize
- Wooden Egg Craft
- Easy Dried Orange Wreath
Farmhouse Chic Living
Bring the charm of the farm into your home with our delightful DIY soap tutorial!
Crafted with love and sprinkled with flowers, these spring-inspired bars are a must-try.
