
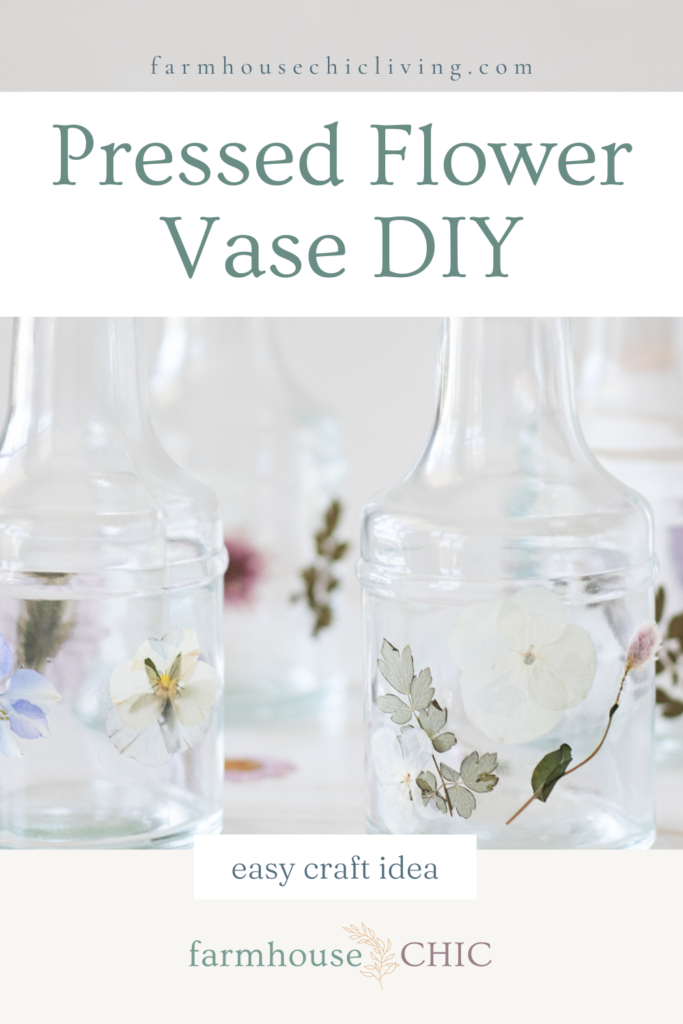
Pressed Flower Vase DIY
Farmhouse Pressed Flower Vase DIY Craft Idea For Glass Vases
This easy pressed flower vase DIY craft idea for glass vases is a beautiful way to display pressed flowers in your home decor.
The first blooms of spring have arrived in our gardens surrounding the farmhouse. Honeysuckle, daffodils, and tulips are bursting through to usher in the season.
The cardinals are nesting at the edge of the woodlands and a gentle choir of crickets are gathering each evening. Signs spring picnics on the fresh lawn, fishing in the pond, and spotting new fawns are just around the corner.
But all I can think of right now is that I need to make room to press all the spring blooms, haha!
Does anyone else share my concern? Whether you have pressed flowers from last year filling your drawers and books or want to press your first, you’re in the right place.
This easy pressed flower vase DIY craft idea is a brilliant way to use your stash or get started with flowering pressing!
I’ll share four ways to press flowers and tips for how to seal flowers so you get the most out of each new bloom.
For your convenience, this post contains some affiliate links; read the full disclosure policy.
How To Press Flowers This Spring
This DIY pressed flower project is a beautiful way to display pressed flowers in your home decor. Whether this is your first time pressing flowers or you’re keen to try a new method, start here!
Wooden Flower Pressing
Popular during Victorian times, this traditional flower pressing method used a wooden press. It involves placing flowers between thin drying papers and sandwiching several layers between the wood mats.
The flowers take weeks to dry and flatten, but the outcome is beautiful. For the best results, read my steps on how to use a wooden flower press.
Book Page Pressing
I started pressing flowers in my youth with this basic method of tucking flowers between pages of books and journals. All it requires is closing the book or journal, placing something heavy on top, and waiting several weeks for the flowers to press flat.
Iron Pressing
If you’re ready to get your hands on pressed flowers, you might enjoy this quick flower-pressing technique. Place flowers between parchment paper and press firmly on a heat-safe surface with a dry, hot iron. Just be careful not to burn yourself or overdo it and burn the flowers. (Guilty)
Microwave Pressing
This fast flower pressing technique is my favorite for thick flowers. It takes mere minutes to zap flowers dry and flat in the microwave with a microwave press. Look at my before and after photos to see how well it works!
No matter which flower-pressing method you choose, you can create adorable DIY flower vases for Mother’s Day, a Teacher’s Gift, or just because.
It’s an easy craft idea that you can create with your little ones. My 2nd-grade daughter made three of the four glass vases you see in the photos!!

find this helpful?
Share It On Pinterest
While there, follow Our Farmhouse Chic Living for more inspired ideas.
Tag #farmhousechicliving on Instagram to share your farmhouse tips and ideas!
Related To: Pressed Flower Candle Holders DIY Craft
How do you seal pressed flowers on glass?
You’ll love how easy this pressed flower vase DIY craft idea is for glass vases. It’s now one of my favorite flower vase ideas for decorating empty vases. But how do you seal pressed flowers on glass?
I’ve had the chance to test a few things in the process of making a pressed flower monogram, pressed flower art frames, and candle holders.
I’ve used instant glass glue, which dries fast and is completely clear. It’s perfect for holding flowers in place inside a frame. But I don’t love how it looks applied on top of pressed flowers, so I turned to Mod Podge.
Is Mod Podge safe for pressed flowers? Yes, It stops moisture from reaching pressed flowers, deters petals from breaking apart, and keeps them in place!
I recommend this all-purpose sealer or dishwasher-safe Mod Podge for this project. Both dry clear and leaves a smooth finish.
Easy Pressed Flower Vase DIY Craft Idea
How do you make a pressed flower vase? It’s simple! Once your pressed flowers and Mod Podge are ready, you only need a paintbrush and a glass vase.
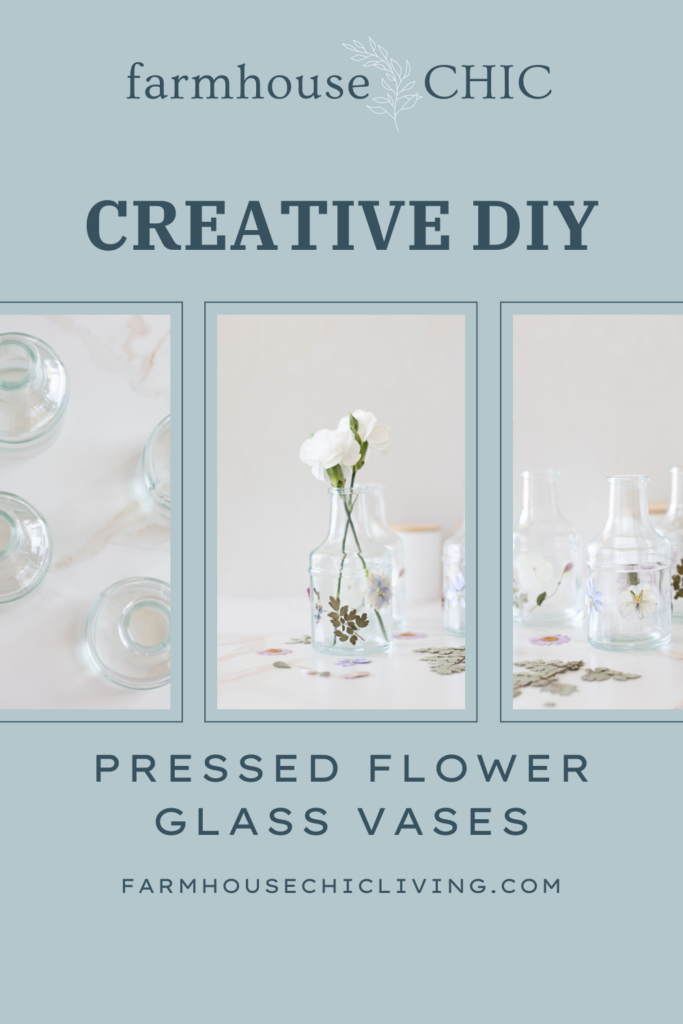
I chose a set of bottle-shaped glass bud vases from World Market. Find a similar set here, or decorate a vase you have sitting in the back of your butler’s pantry or under the kitchen sink.!
What I love about their petite size is that they coordinate beautifully with our farmhouse decor, showcasing a single stem individually or gathered in a display.
Project Supplies
- Pressed Flowers
- Glass Bud Vases
- Mod Podge for Glass
- Small Paint Brush
- Curved Tip Tweezers
NOTE: Before you begin, make sure your pressed flowers are completely dry. If they are not dry, your design could begin to develop mold.
How To Make A Pressed Flower Vase
After a bit of drying time, each vase decorated with pressed flowers will be ready for use.

These pressed flower glass vases are the perfect handmade gift idea for Mother’s Day! She’ll always have flowers with a glass vase decorated with colorful pressed flowers.
MORE FARMHOUSE IDEAS: