Farmhouse DIY Dough Bowl Candle
Farmhouse DIY Lemon Lavender Dough Bowl Candle
Create a stunning farmhouse DIY dough bowl candle with instructions for how to make a dough bowl candle safely at home.
It’s practically spring, and I can hardly wait! I’ve already started spring organizing and moved the furniture in four rooms of our farmhouse along the way. (Does anyone else love rearranging your furniture each season?)
Picnics by the pond, pressing spring blooms, and Easter egg hunting are on the calendar this month. But first, I’m making spring candles!
And what better spring candle scent than lemon lavender? I enjoy finding new ways to bring this fresh duo to life in our farmhouse, from lemon soap to lavender candle melts; I can’t stop.
With a burst of freshly squeezed lemon juice balanced by calming lavender flowers, it’s an ideal scent for any room in your farmhouse! This homemade dough bowl candle is the perfect pairing of lemon and lavender poured into a rustic, large wooden dough bowl.
What is a dough bowl? During colonial times in America, dough bowls were hand-carved from wood to create a snug, warm place for bread to rise before baking.
It was tradition to hand them down from mother to daughter as the heart of the kitchen. A symbolism I can appreciate when baking pie with my grandmother’s glass pie pan that was passed down to me. Each time I use it, I think of her.
Is it any wonder why so many adore dough bowl candles? With a surge in popularity, these farmhouse-style candles continue to grace our tables today.
Better Homes and Gardens points out that the beautiful craftsmanship of wooden dough bowls extends as a natural element in our homes that we can’t resist decorating.
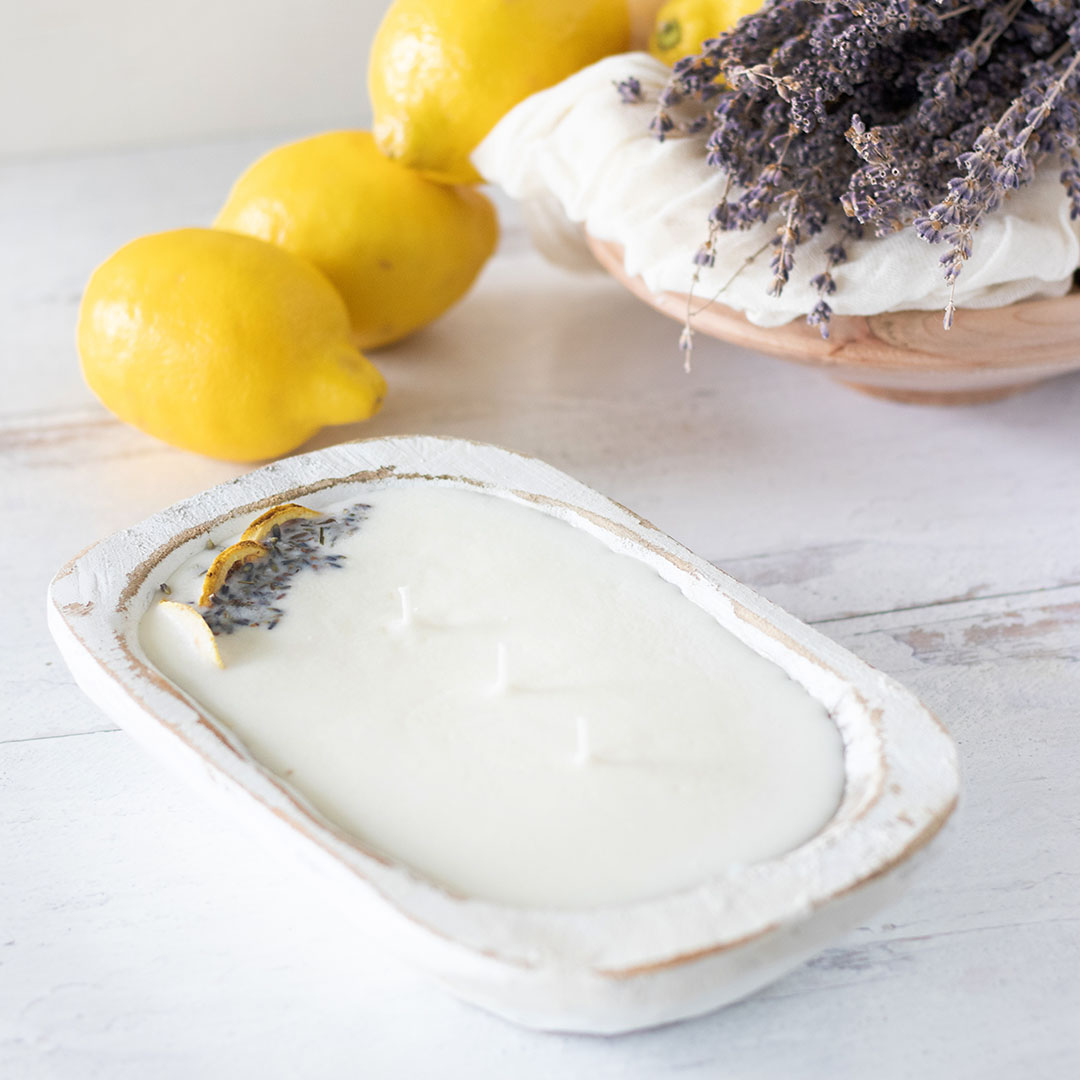
If you’ve been eyeing these oversized rustic candles, let me show you how to make a dough bowl candle. Filled with dried lemon slices and sprinkled with lavender flowers, it makes the perfect candle centerpiece for spring and summer!
For your convenience, this post contains some affiliate links; read the full disclosure policy.

Are dough bowls safe for candles?
Before I began hunting for a wooden dough bowl for candle making, I wondered if it was safe to make candles in dough bowls. It turns out that it’s not much different if you’ve made a container candle before.
There’s just one thing you need to do first to ensure the wooden dough bowl is safe for candle making. And that’s sealing!
I learned this step was necessary for all wood containers when I made a cheese mold candle. Without sealing, you put your home at risk for fire.
How do you seal wood dough bowls for candles?
Follow these easy steps to make a dough bowl safe for candle making!
How To Seal Dough Bowls For Candles:
Yep, no wax is getting through that water-tight barrier!
Now, you can create a gorgeous large dough bowl candle that safely makes a stand-alone candle centerpiece. And focus on the pretty things instead, like decorating and the candle scent.

Decorating A Dough Bowl Candle
How can you decorate a dough bowl candle? I came up with a list of ideas when I got my hands on my first dough bowl! I’ll share a few of them here with you.
Farmhouse Style
Dough Bowl Candle Ideas
Ultimately, I tuck dried lemon slices into the creamy soy wax and sprinkled lavender flower buds to make a farmhouse spring candle!
Related To: Lavender Garden Ideas

Creating a DIY Farmhouse Lemon Lavender Dough Bowl Candle
You’ll amaze everyone who walks into your farmhouse with this large handmade 3-wick dough bowl candle! It’s a charmer with a signature spring candle scent, preserved lemon slices, and lavender flowers.
Dough Bowl Candle Supplies:
Candle Maker Tools You’ll Need:
How To Make A Dough Bowl Candle:
Before you begin, cover your area with parchment or wax paper to place your dough bowl on top of it. Then, gather all your supplies and candle maker tools.
1. Seal It:
Wipe dust out of the wooden dough bowl with a damp cloth. Then, check it for visible cracks in the wood. (Avoid using one with cracks or large holes.)
Apply two heavy coats of 100% waterproof sealant with 30 minutes of drying time between each coating to make it candle-safe.
2. Place Candle Wicks:
Evenly place three wick-centering devices across the top of the dough bowl. Then, stick a wick sticker beneath the center hole of each.
Lift up the first centering device and thread a soy wax-dipped cotton wick through it. Then, stick the metal wick tab onto the 1st sticker. Repeat for the remaining candle wicks.
3. Measure and Melt Candle Wax:
Now, it’s time to measure the candle wax. Place a candle making pitcher on top of a kitchen scale. Tap tare and measure 12.6 ounces of soy wax. Place the wax-filled pitcher inside a saucepan with approximately 2 inches of water around it.
Use the double boiler method to heat the wax on low up to 160°F. A no-touch infrared thermometer or inexpensive candy thermometer helps keep an eye on the temperature of the wax.
No candle pitcher? This natural soy wax is microwavable! However you melt it, slowly stir the wax, often with a heat-resistant silicone spatula.
4. Add Candle Fragrance:
Once the soy wax is completely melted, remove the wax from the heat source and add your fragrance. You’ll need a total of 1.45 ounces. Use lemon and lavender essential oil, or find a favorite spring candle scent here.
After adding your fragrance to the melted wax, stir it slowly for 1 to 2 minutes to thoroughly incorporate the scent.
5. Pour Candle Wax & Decorate:
Use the spout of the candle melting pitcher to pour the scented wax into the dough bowl, avoiding the wick center devices. Allow the wax to begin to harden for a few minutes before decorating.
Tuck three dried lemon slices in the top of the dough bowl away from the candle wicks. Then sprinkle the wax with up to 1 teaspoon dried lavender buds. (Don’t put the lavender by the wicks, or they’ll clog it up when you burn it.)
Wait for your new dough bowl candle to cure for three to five days before lighting it for a strong scent. And don’t forget to trim the wicks to ¼ inch before each use.
find this helpful?
Share It On Pinterest
While there, follow Our Farmhouse Chic Living for more inspired ideas.
Tag #farmhousechicliving on Instagram to share your farmhouse tips and ideas!


